
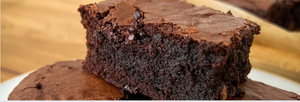
Our Ultimate Brownie Recipe (makes 16 delicious squares)
Ingredients
200g unsalted butter
200g best dark chocolate
90g plain flour
45g cocoa powder
100g milk chocolate (We love using Cadbury’s for this recipe)
3 large eggs
280g golden caster sugar
Equipment
Medium Mixing bowl x 2
Large mixing bowl x 1
Sharp knife
Rubber spatula
Sieve
Electric whisk
Baking paper or foil
Baking tin (we recommend a 20cm square tin)
Method:
20 minutes prep, 20-30 minutes cooking
- Cut the butter into small cubes and add to a mixing bowl. Next, break up the dark chocolate into small pieces and add to the butter.
- Boil the kettle and add water to a small saucepan, you only need a couple of inches depth of water. Sit the mixing bowl on top of the saucepan so it rests on the rim but ensure that the base of the bowl isn’t touching the water. Turn the heat on low and stir occasionally until the butter and chocolate has melted.
- Once melted, remove from the pan and allow to cool down to room temperature.
- While the chocolate and butter mixture is cooling pre-heat your oven to 180°C conventional/190°C fan. Next, cut out a square of kitchen foil (or non-stick baking parchment) to line the base of your chosen baking tray, I would recommend a 20cm square tray.
- Then, add the plain flour and cocoa powder into a sieve over a mixing bowl. Then tap the sieve across the palm of your hand and shake them through together to remove any lumps.
- Chop the milk chocolate into chunks, these will be mixed in before cooking so I’m never too precious about the size, some are larger chunks and some are smaller.
- In another large bowl break in the eggs and add the golden caster sugar. Using an electric whisk on maximum speed, combine the eggs and sugar. They will turn thick and creamy, like a milkshake. Depending on the power of your mixer this can take between 4 – 8 minutes. We want the mixture to become really pale and double its original volume, or alternatively you can check by turning the mixer off, lifting the beaters out and seeing if the mixture leaves a trails on the surface of the mixture for a second or two – if it does, that’s perfect.
- Next, pour the cooled chocolate mixture into the whisked egg and sugar and gently fold together with a rubber spatula using a figure of eight motion by plunging the spatula in one side, taking it underneath and bringing up the opposite side and again in the middle. Continue, gently, until fully combined. This can take a good few minutes, gentle and slow is the aim here, we want to keep as much air in as possible.
- Then, holding the sieve over the chocolate mixture re-sieve the cocoa and flour mixture into the bowl, distribute as evenly as you can across the top of the mixture by moving side to side. Next, gently fold in using the same figure of eight motion as before. Again, slow and steady with this again, initially it will look a bit dusty but keep going it will get there. We don’t want to overmix and knock out the air so if you think it’s done (thick and fudgy) then it is, stop there.
- Finally, stir in the milk chocolate chunks and make sure they are distributed evenly, again slow and steady.
- Pour the mixture into your prepared baking tin, using your rubber spatula make sure you scrape out all the mixture and use the spatula to coax the mix into the corners and evenly across the tin.
- Place in the oven (in the middle) and set your timer for 20 minutes. Check your brownies carefully, pull them out and give them a gentle wobble. If it wobbles in the middle it’s not quite done and so place back in the oven for another 5 minutes, you may have to do this twice. You want the top to be nice a crispy and the sides coming away from the tin slightly.
- Once cooked take out of oven and allow to cool completely, no matter how tempting it is! Once cooled, carefully remove from the tin and using a sharp knife, portion accordingly.